Skip to content


How to Install your Netafim Drip Irrigation System
Make sure you have all the parts before you start:
- Pressure Reducing Valve
- Netafim Filter
- Nut & Tail
- Low Density Poly Pipe
- Hole Punch
- Start Connector
- Techline AS Dripperline
- 13mm Ratchet Clamp
- Stakes
- Threaded Elbow
- Automatic Flush Valve
If you’re not using soaker hoses in your garden, now’s the time to start. It's a highly efficient way to water, so while you may spend a little on a soaker hose and fittings at the onset, you will recoup those costs in time and money saved on watering your garden. Studies show that well-designed drip irrigation systems use at least 30% — and in some cases 50% less water.
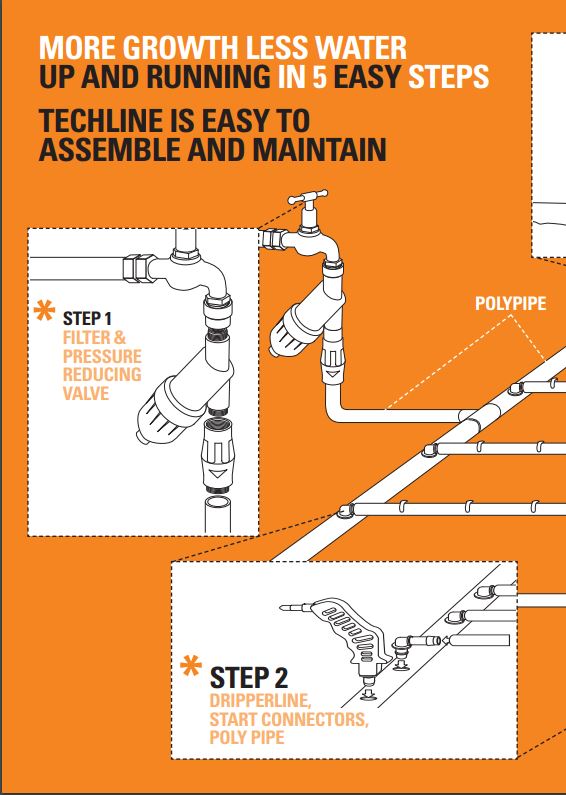
STEP 1: Set up the feed line
- Connect the Filter and Netafim Pressure-reducing Valve to the water supply.
- Run the Low Density Poly Pipe towards the area to be irrigated.
- Plug ends of Poly Pipe with end plugs leaving the furthest point of the system unplugged.
Maintenance
> Turn the water on > Let water run through the system for approximately one second for every meter of dripperlines installed, re-connect the Automatic flush valve
|
STEP 2: Connect the dripline
- Use the Hole Punch to create dripperline connection points within the poly pipe at 30cm intervals
- Insert one end of the Start Connectors into the Techline AS Dripperline and then the other end into the holes punched into the Poly Pipe
- Secure the Dripperlines to the Start Connectors using Ratchet Clamps
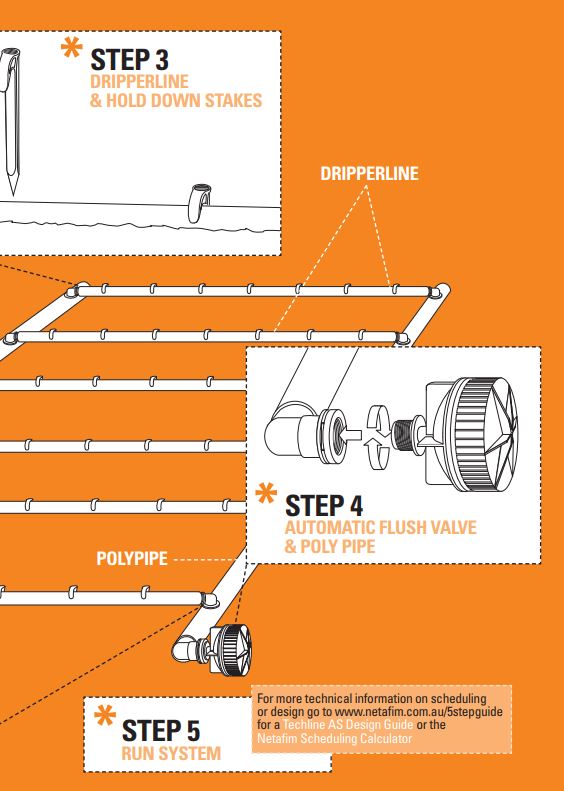
STEP 3: Lay the dripline
- Lay the dripperlines in a grid shape over the garden area, approximately 30cm apart
- Stake the dripperlines at 3m intervals using the Pipe Stakes
- Connect the dripperlines into a collection line of Poly Pipe at the far end of the grid
STEP 4: Connect the driplines
- Connect the Automatic Flush Valve to the furthest end of the collection line, at the lowest point within the dripper system
- Manually flush the drip system thoroughly before starting irrigation
NOTEDo not exceed the maximum run length of the dripperline:
|
STEP 5: Set the running time – and you’re good to go!