Christy's Fiberglass Pipe Bandage Repair Kit
Sale
Sale
Original price
$112.00
-
Original price
$139.00
Original price
$112.00
$112.75
$112.75
-
$139.90
Current price
$112.75
| /
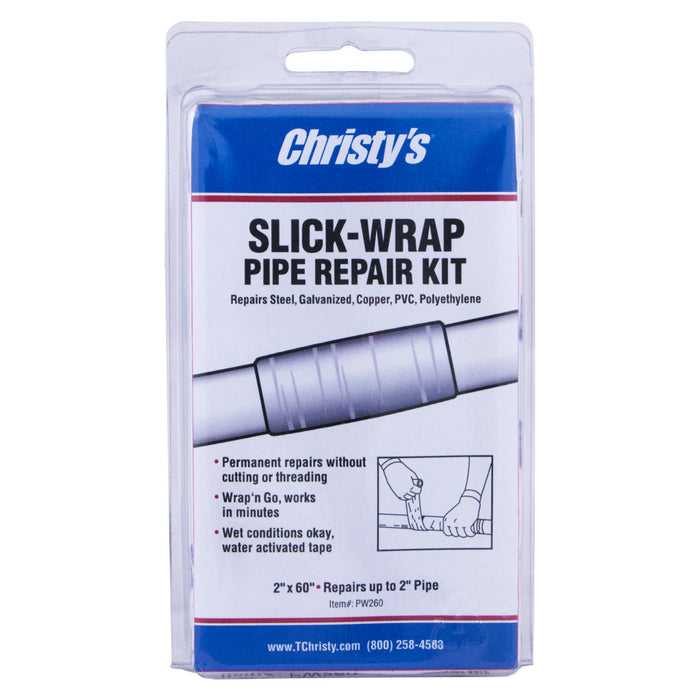
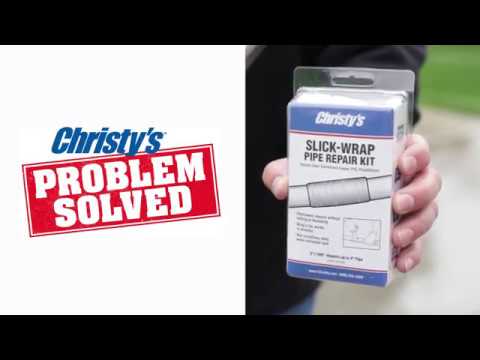
Christy's Fiberglass Pipe Bandage Wrap
Slick-Wrap™ is a specially formulated epoxy resin impregnated repair tape system and includes a piece of FastFix™ epoxy putty. Slickwrap™ can be used to seal leaks or cracks in virtually any type of piping system, including plastics, copper, metal, cast, galvanized, fiberglass, ductile and poly pipe. Slick-Wrap™ is an ideal repair system when conventional repairs or replacement are not feasible. Slick-Wrap™ works by creating a fiberglass/resin epoxy pipe over the host piping material, allowing for either a permanent or temporary repair at pressures up to 300PSI (with 8 wraps over the break). Slick-Wrap™ will cure under water. To guarantee the highest probability of success, we recommend following our directions closely, repairing pipe breaks can be a difficult and time-consuming task.
- Pipe and hose repair kit for steel, galvanized, copper, PVC and polyethylene
- Wet conditions OK
- Quick-drying water activated fiberglass tape
- No tools required
- Pressure tested to 300+ PSI (line pressure must be off during installation)
- Use in temperatures from -60˚ to 800˚F
TECHNICALpvc
| Form |
Impregnated Fiberglass Cloth |
| Color |
Grey |
| Fabrication Method |
Wet Lay-Up |
| Number of Wraps Required |
8 (min) for High Pressure |
| Cure Cycle@70°F/21°C |
30 minutes (wet) |
| Hardness - Cured Laminate |
53 Barcol |
| Heat Resistance |
800°F / 427°C |
| Dielectric Strength |
16.969 |
| Line Pressures |
600 PSI / 40KPA |
| Shelf Life |
Unlimited when properly stored |
RECOMMENDED SIZES
| Pipe Diameter |
Slick-Wrap Size |
SKU |
| Up to 2” - 25mm |
2” x 60” - 50 x 1500mm |
PW260 |
| Up to 4” - 100mm |
3” x 108” - 75 x 2700mm |
PW3108 |
SPECIAL CONSIDERATIONS
For safety and health precautions please consult our Material Safety Data Sheet on this product. Multiple packages of Slick-Wrap™ can be used for larger applications or breaks. Follow directions carefully, Slick-Wrap™ does not “shrink to tighten”. Slick-Wrap™ can be used in a wet environment and can be pressurized 45-60 minutes after application.
SLICK-WRAP™ INSTRUCTIONS WITH EPOXY PUTTY
- Remove all pressure from damaged section of pipe before attempting repair.
- Remove all oil, grease, loose rust scale, sealant tape, paint and hardware from area to be repaired.
- Put on latex gloves (gloves go on best when hands are dry).
- Remove putty from kit. Twist/Cut/Break off enough putty to fill repair area and overlap on to piping.
- Knead putty to uniform color (consistent gray color free from black specs).
- Apply kneaded putty into repair area tapering putty on to piping. Putty repair should be in place before hardening begins (usually 2 minutes). If making repair while submerged in fluid, work putty into repair area and hold until adhesion begins.
- Open foil pouch. Remove tape and drop in pail of water or pour water in the foil pouch. To ensure water is distributed to all portions of the tape, squeeze the tape for at least 20-30 seconds. If using pouch to wet tape, allow at least 1 minute to soak tape.
- Starting on the opposite side of the break, begin to wrap the tape, keeping tension applied to the tape at all times. Continue to wrap the tape, moving from left to right until the leaking area has tape applied 2 inches (5 cm) on either side, and has at least 8 to 10 layers directly over the leak. (Use all tape in package as tape cannot be saved for future use once foil pouch is opened).
- Once all tape has been applied to leak, grab the taped area, squeezing firmly, and rotate your hand in direction of wrap. This causes all bottom layers of tape to tighten in case they become loose.
- As the resin begins to cure bubbling will occur. This curing along with some swelling of the resins will give the tape a tendency to unwrap. YOU MUST MAINTAIN PRESURE TO PREVENT UNWRAPPING. Continue to apply pressure in the direction of the wrap until the curing process has advanced enough to hold itself in place without backing off. As curing takes place, the tape will become very sticky. At room temperature the wrapping part of your repair should take between 12-15 minutes.
- Allow 30-40 minutes for final curing. It will take longer in subzero temperatures.
- Cleanup can be done at this time using alcohol or acetone.
- After final cure has occurred, tape can be sanded and painted if desired.
 Skip to content